Ilham On Android: Designing The Interface (Part 1)
— posted on January 5, 2015 12:23 PM
Share this to
 Google recently released a new IDE for developing Android application, namely Android Studio. This post will be the first of a series of posts briefly on how to use the IDE and finally come out with a simple app.
I will be developing a BMI app, which is easier to understand. Let's set out some requirements for the app:
Google recently released a new IDE for developing Android application, namely Android Studio. This post will be the first of a series of posts briefly on how to use the IDE and finally come out with a simple app.
I will be developing a BMI app, which is easier to understand. Let's set out some requirements for the app:
- Designed following Google's new design guidelines, Material Design
- Targeting for Jelly Bean and newer devices
- The interface should be as simple as possible
New Project
At this time of writing, I am using Android Studio 1.0.2, and a Nexus 4 using Android 5.0.1. Put in the following details (you can put your own if you like) for our new app:- Application name: Body Mass Index
- Company domain: i906.my
- Package name: my.i906.bmi
- Phone and tablet minimum SDK: API 16: Android 4.1 (Jelly Bean)
 Hello world![/caption]
Color Theme
The Material theme allows us to set base colors for the app. I have chosen two colors from the guidelines and set it in colors.xml and styles.xml files. Most of the widgets will match the colors that have been set as below. https://gist.github.com/i906/eda4fb0ab149de6e2dbfLauncher Icon
[caption id="attachment_5866" align="alignright" width="72"] The icon[/caption]
I used an icon generator to create a random icon for the app. The original icon, ic_launcher.png files are located in the drawable folders. The generator created a zip file, and its contents were merged into the project's folder.
The icon[/caption]
I used an icon generator to create a random icon for the app. The original icon, ic_launcher.png files are located in the drawable folders. The generator created a zip file, and its contents were merged into the project's folder.
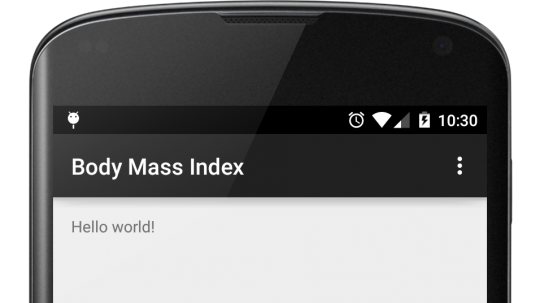
Screen Layout
The Hello world layout above belongs to Main Activity we have created earlier. The layout file is located in the layout folder, activity_main.xml. [caption id="attachment_5862" align="aligncenter" width="540"]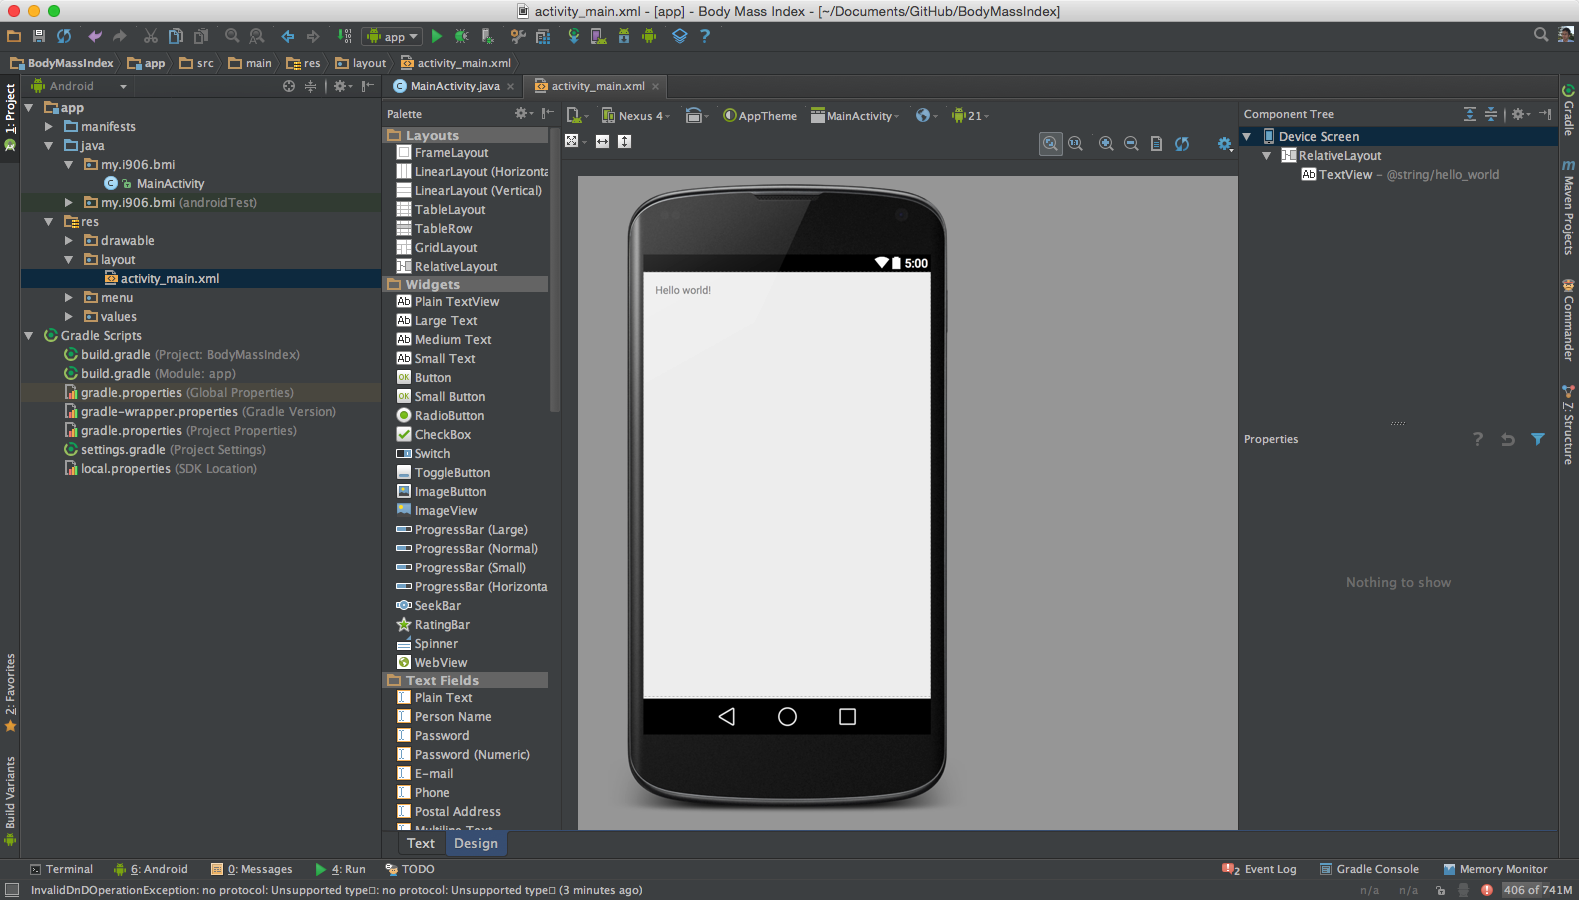 Layout Editor[/caption]
We want to show the BMI results on the top, followed by two input boxes for entering the BMI calculation, the height and the weight. Android Studio allows drag and drop of several widget, you can preview the layout on how it would look like on the device. Though for some reasons, I prefer to use the text editor instead.
Drag/write some TextView and EditText into the editor. Use LinearLayout to stack widgets or other layouts. The code I have written for the layout can be seen here.
Layout Editor[/caption]
We want to show the BMI results on the top, followed by two input boxes for entering the BMI calculation, the height and the weight. Android Studio allows drag and drop of several widget, you can preview the layout on how it would look like on the device. Though for some reasons, I prefer to use the text editor instead.
Drag/write some TextView and EditText into the editor. Use LinearLayout to stack widgets or other layouts. The code I have written for the layout can be seen here.
 As seen in the styles.xml above, the app is using AppCompat theme. This theme is used for bringing Material themes to devices that are not using Lollipop yet. The theme provides several styles that can be used in the app. To use these styles, simple add @style/TextAppearance.AppCompat.STYLENAME to the style tag of the widget.
I also consolidated all label texts in one file, strings.xml for easier management.
https://gist.github.com/i906/76d5165b569867f795f2
[caption id="attachment_5879" align="alignright" width="171"]
As seen in the styles.xml above, the app is using AppCompat theme. This theme is used for bringing Material themes to devices that are not using Lollipop yet. The theme provides several styles that can be used in the app. To use these styles, simple add @style/TextAppearance.AppCompat.STYLENAME to the style tag of the widget.
I also consolidated all label texts in one file, strings.xml for easier management.
https://gist.github.com/i906/76d5165b569867f795f2
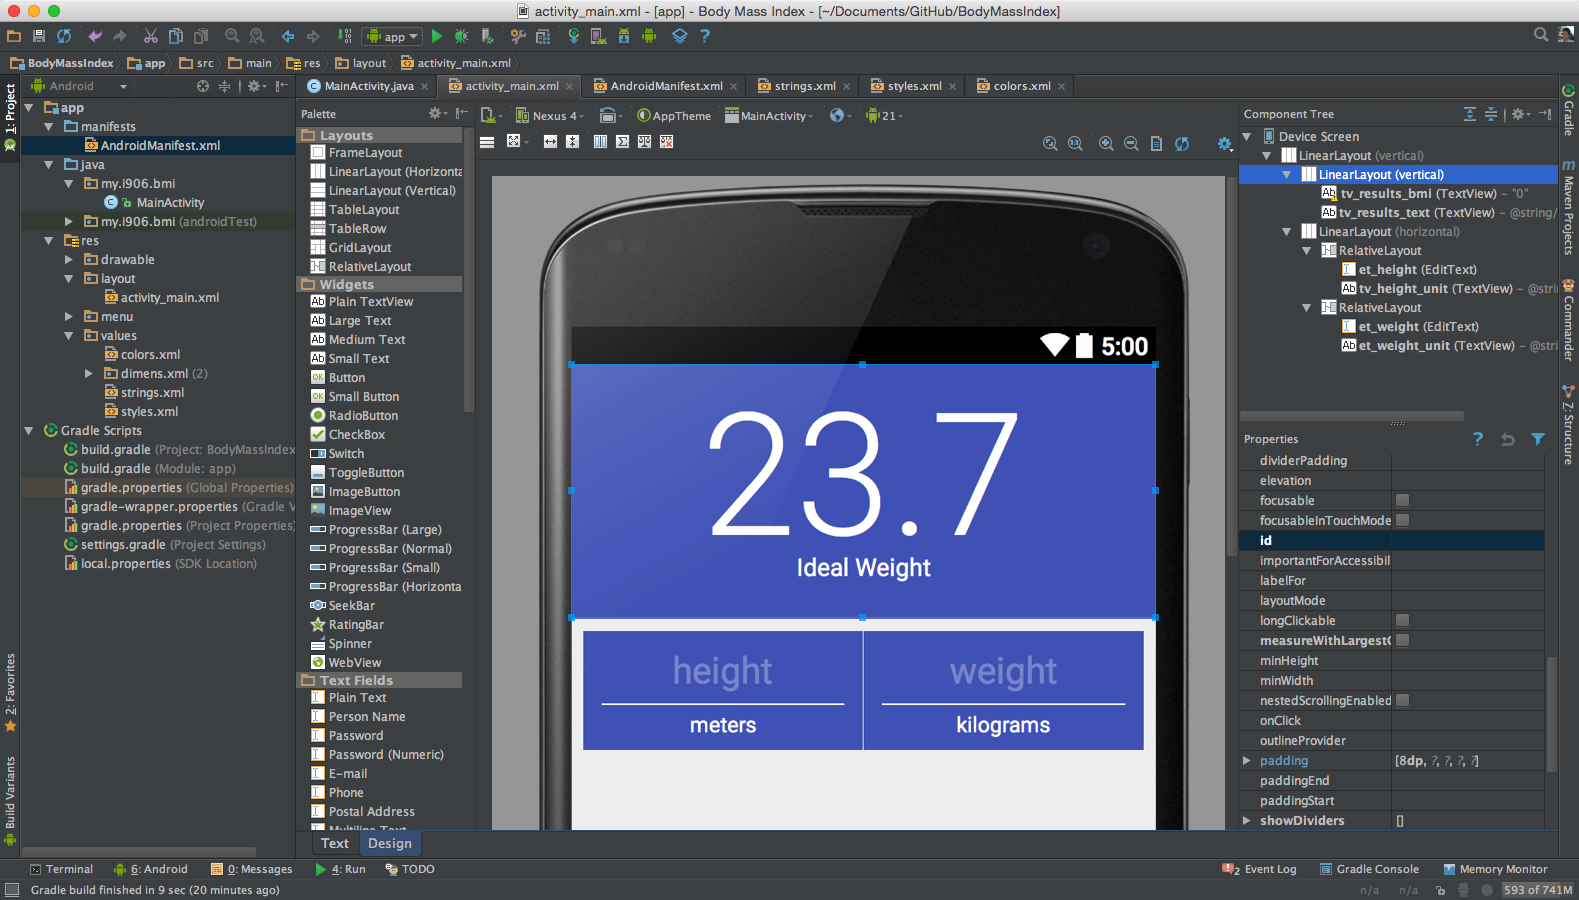
[caption id="attachment_5879" align="alignright" width="171"] The completed layout[/caption]
Build and run the project again. If all is in order, the resulting app should look like this:
You can only enter numbers and a single decimal point in the input boxes. The code android:inputType="numberDecimal" tells the keyboard to show the relevant buttons for inputting numbers.
The completed layout[/caption]
Build and run the project again. If all is in order, the resulting app should look like this:
You can only enter numbers and a single decimal point in the input boxes. The code android:inputType="numberDecimal" tells the keyboard to show the relevant buttons for inputting numbers.
Conclusion
In this post, only a brief introduction on layout have been touched. The codes to calculate the BMI will be available in the next post. The codes for this part also can be found in this repository. As always, thanks for reading. Feel free to leave comments or questions!Share this to